-
Determination of the accuracy and repeatability of 3D measurements for:
- x, y position
- Area
- Height
- Volume
-
Objective and independent measurement and analysis certified according to DIN ISO 9001
-
Verification of the effectiveness of the supplier calibration
-
Calculation of \(C_m\) and \(C_{mk}\) values based on given specification limits
-
Comparison of results at different orientations of the test object (typically 0° and 180°)
-
Detailed and meaningful test report
Measurement Service for Determining Positioning Accuracy on SMT Equipment

Determination of Machine Accuracy for 3D SPI
Preparation from CeTaQ
- Data for creating the test program consisting of Gerber and PIN-CAD
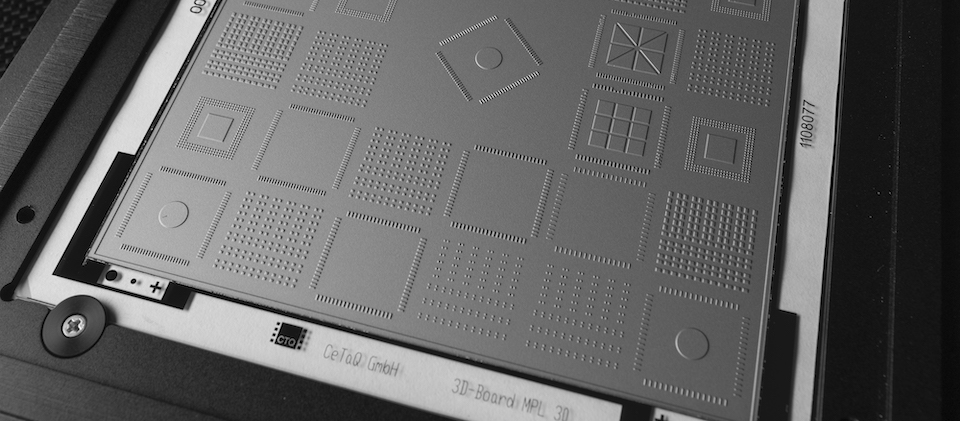
- Calibrated 3D glass plates
Preparation from Customer
- Executable machine program created according to the provided Gerber and PIN-CAD data
- Ensuring a good condition of the system to be inspected by prior maintenance and, if necessary, calibration
- Technical support for setting up and operating the system
- Export functionality of the measurement results into an ASCII readable format
SPI Measurement of the 3D glass plate
The system to be examined is prepared by the technical support and the corresponding program is loaded.
Then the glass measuring plate is transported into the SPI system and analyzed.
At the end of the measurement the results are exported in a suitable format.
The measuring plate must be transported out of the machine and reloaded.
Then a new measuring cycle starts.
This is typically repeated 3-5 times.
This completes the measurements for the 0° orientation and the process is repeated for another orientation, e.g. 180°.
Analysis of the Results
After the measurement acquisition is completed, the data is exported from the SPI into an ASCII readable format. Here it is necessary that the measured values can be assigned to the PAD-ID. They will be transformed so that it fits the import format of our statistics software CmCStat. Once the transformation is complete, the data is imported and analyzed. This analysis focuses on both accuracy over a single measurement and repeatability over all. Possible differences between the different orientations are another aspect of the analysis.
Use of the Results to Optimize the Accuracy
As a result of the data analysis, the machine is evaluated with regard to its specification. In many cases, it is possible to derive necessary corrective measures to optimize the accuracy. In the simplest case, this can be, for example, the recommendation to carry out a calibration with OEM tools on the system.
If mechanical causes are the reason for a failure to meet the specification, the measurement results can be used to narrow down the problems. This makes it easier for the manufacturers service department to find the fault.
After corrections have been made, their effectiveness is checked with a further measurement. Depending on the result, further measures may be necessary, followed by verification measurements.
Report Writing
Based on the final condition reached, a test report is written at the end of the evaluation. This is usually written in our office within a few days after a customer visit. Besides the detailed description of the final results, it contains the history of the necessary steps to reach the final condition.
- The glass board used is calibrated on the basis of international standards.
- The method is suitable for all 3D SPI whose imaging system can detect 3D structures of glass.
- The time required at the SPI for a complete examination is usually between 1 and 2 hours, depending on the type of system. A typical time is one hour. Additional time for transforming, importing, and analyzing the data, depending on the format of the exported data, must be taken into account.
