Machine capability test as a service

General procedure

The main objective of an MCA is to gain knowledge about the behaviour of a process, determine measurable attributes and create improvement from this knowledge. In traditional manufacturing, products are taken from ongoing production, quality-relevant parameters are measured and evaluated using statistical methods. In SMT, for example, there are various reasons why it is not possible to measure the position of assembled components on a printed circuit board taken from production (see also "SMT is Special"). For this reason, auxiliary devices such as glass measuring plates are used to determine the placement accuracy. For optimal gain of knowledge about the behaviour of the systems, the measuring process should simulate as closely as possible the usual production.

The basic process flow of an MCA can be divided into the following steps:

  1. Problem Analysis
  2. Inspection Planning
  3. Measurement Preparation
  4. Performing the Measurement
  5. Results Analysis
  6. Improvement Measures, if necessary
  7. Documentation of the Results

If the MCA is not a regularly scheduled event, maybe there is a production problem requiring investigation. In either case, task definitions are recorded during the analysis. These include the type of system to be examined, such as the placement system or printing system and the parameters to be measured, such as x-y-theta accuracy or placement force. In addition, the configuration of the system must be known, such as the type and number of assembly heads (high speed or multifunctional), the number of transport tracks, type and number of cameras, typical board dimensions and the component spectrum to be processed.

The expected specification limits are also important. They are used for subsequent assessment and also for selecting the measuring instrument. As a rule of thumb, the measuring equipment must be a factor of 10 more accurate than the process to be measured. When determining specifications, the specifications of the machine manufacturer and the requirements from the production process should be considered. For example, it makes sense to use a uniform process specification in production runs with lines of different machine generations and manufacturers and thus different manufacturer specifications, which ultimately process the same products. This makes it easier to assess the production quality and to decide on any necessary repairs and maintenance measures.

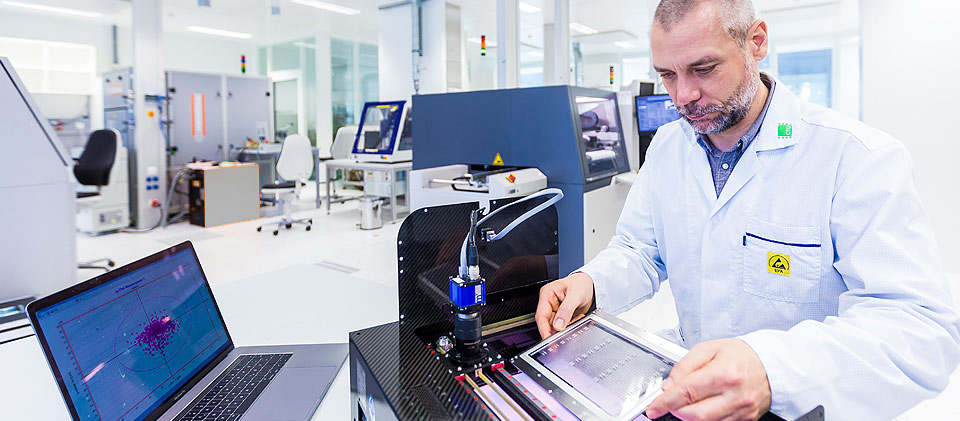
A corresponding measuring sequence is defined during the test planning. The aim is to capture the properties of the machine as closely as possible to the typical processing sequences. The test planning includes the selection of the corresponding measuring board and component spectrum. If, for example, the accuracy of a high-speed pick and place machine that processes 0402 chip resistors in production is to be tested, it is not desirable to use components with 2x2 mm dimensions. Under certain circumstances, problems that occur during production may not be easily visible. In addition, the number and position of the measurement objects on the measuring board are determined based on the configuration of the machine. In the case for systems with several placement heads, it is important to ensure a sufficient and equal number of components are used for each assembly head.

Based on the test plan, the program for the machine under investigation is then created. The basis is an ASCII file, which contains information about the positions and the components to be used. It is important that the programmed sequence corresponds to the planning or is traceable. If, for example, the component has a 0° orientation and is assigned to head 1 in the test planning, a deviation of the placement program from this assignment will later lead to misinterpretation of the results.

After the machine program has been created, the measuring board is processed by the equipment and then measured with a mobile on-site measurement system. Depending on the measurement task, different measuring systems can be used. These measurement tasks are determined by the measurable quality attribute of the process step that is being investigated. After the measurement is complete, a statistical evaluation takes place.

The measured mean values of each measurement object location are prepared statistically for the analysis. Different numerical and graphical tools are available for this purpose. The basic principle is always the comparison of the measured value with the expected or adjusted nominal set point. For example in a placement system, this means a target value of 0 µm; i.e., the component should be exactly at the position specified by the test program. Based on the specifications, capability parameters are calculated from the measured values and thus the system is evaluated. In the case of deviations from the expected quality, the analysis allows causes to be identified. There are many reasons why specifications are not met. Generally, a distinction is made between random and systematic influences. Systematic influences are; e.g., general component misalignment, faulty calibrations, etc. Once they have been detected, systematic deviations in the machine can be corrected. This can be either by calibration with the manufacturers tools or by targeted intervention in the machine data. Random influences describe the basic accuracy of the equipment. It is determined by the design but also by mechanical wear and tear. This means that improvements can only be achieved by replacing parts or entire systems.

The challenge is to separate the systematic from the random influences and find the optimal strategy to improve system accuracy. Here we benefit from CeTaQ's many years of experience and the knowledge of evaluating more than 10,000 systems worldwide. Furthermore, more than 90% of the specification violations occurring in the field are systematic and can be easily corrected. In other words, the deviations found during an MCA can usually be adjusted by our service engineers directly during the investigation, either independently or with the help of the manufacturers service support. If this is not the case, the results will at least help plan a repair with the manufacturer. If changes are made to the equipment, a further measurement is carried out to confirm the final condition and overall effectiveness.

At the end of the measurements, the results are documented in an independent objective test report. This is used to compare the initial and final states of the machine performance and thus display the current quality capability of the machine. Furthermore, all the necessary steps taken during the evaluation to reach the final result are documented accordingly. And with the DIN ISO 17025 accredited testing service for the determination of the positioning accuracy of SMT systems we offer our customers the possibility to meet the requirements of IATF 16949.